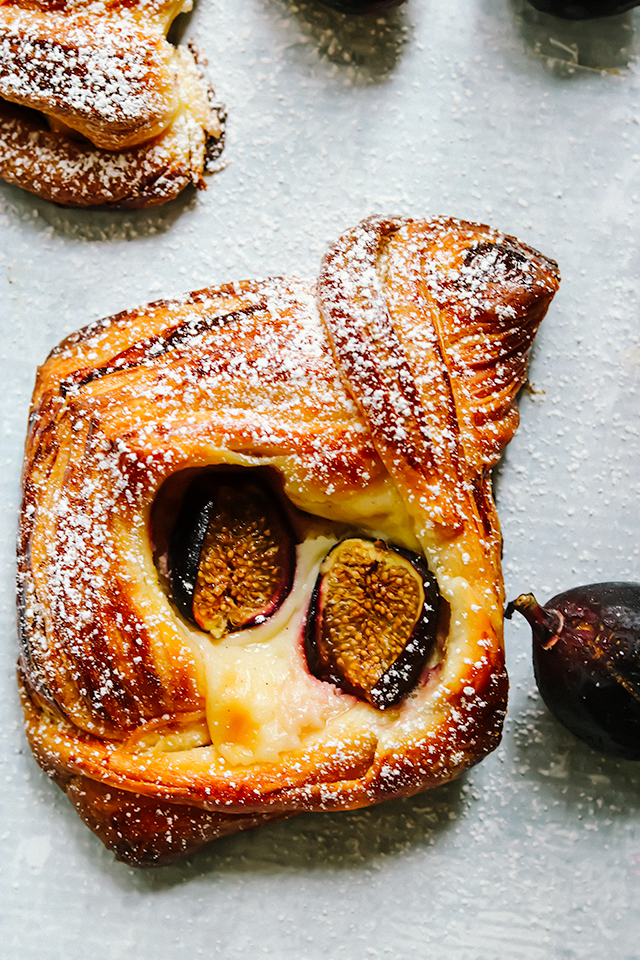
Fresh fig and cream cheese danish are the perfect flaky, buttery breakfast treats. They’re made with homemade laminated dough and are a fun weekend baking project.

It’s only one of the hottest weekends of the year across the United States, so obviously it’s the PERFECT time to be laminating some dough!!
I say that with a little bit of tongue-in-cheek sarcasm but honestly the first time I made these was in July on one of the hottest days of summer. Not the most ideal time to be rolling out sheets of butter interspersed with an enriched yeast dough while praying that everything stays cool and the butter doesn’t melt, but just find yourself a workspace in front of an air conditioner and you’ll be just fine.
One of my baking goals every year basically since the inception of this blog TWELVE YEARS AGO is to learn how to make laminated dough. For so long, I have been so intimidated of the process and just kept putting it off in favor of easier, seemingly more accessible baking projects.
All it took was a year stuck at home every weekend during a pandemic to get me to give it a go. But I am so glad I did because making the dough and seeing your finished project (much like macaron-making) is so so satisfying.
And even when the results look, well, rustic they still taste good.
I am a sucker for any recipe that uses fresh figs, so this recipe for fig and cream cheese danish made it onto my baking bucket list pretty much the second I saw it in the Pastry Love cookbook by Joanne Chang that came out last year. As soon as I saw fresh figs hit the marketplace in earlier summer, I jumped to make it.
The base of these breakfast pastries, as I mentioned earlier, is a laminated dough. This is the same dough that you would use to make croissants or other flaky French pastries. It consists of an enriched yeast dough (meaning dough infused with sugar, butter, and eggs) that gets laminated (hence the name) in-between super thin layers of butter. As the pastries bake, the hot steam released from the butter creates the signature flakes that make these confections so satisfying and delicious to eat.
The instructions to make them are long but not super complicated and there are plenty of videos on YouTube you can watch to get an idea of the process before getting started. The most important thing is for the butter layers to stay cool, so if you start to see them melting just pop your dough in the fridge for 10-15 minutes to get them set again.
Now for the filling!
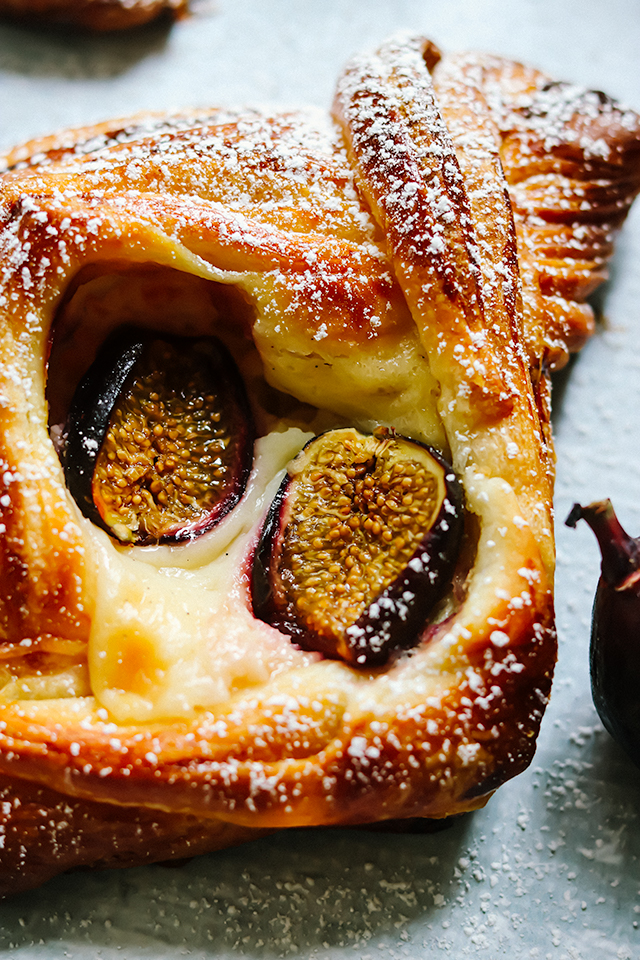
These are stuffed with a really simple cream cheese filling and then topped with fresh figs. The tartness of the figs pairs perfectly with the sweet creamy filling and makes for an indulgent and delicious morning treat.
If you can’t find figs, other fruit would work well here including plums, raspberries, and blueberries.

Probably the most complicated aspect of making these (at least for me) was sticking to the precise measurements provided in the recipe. It is just not my strong suit and exactly why I will never be a French pastry chef (among other reasons).
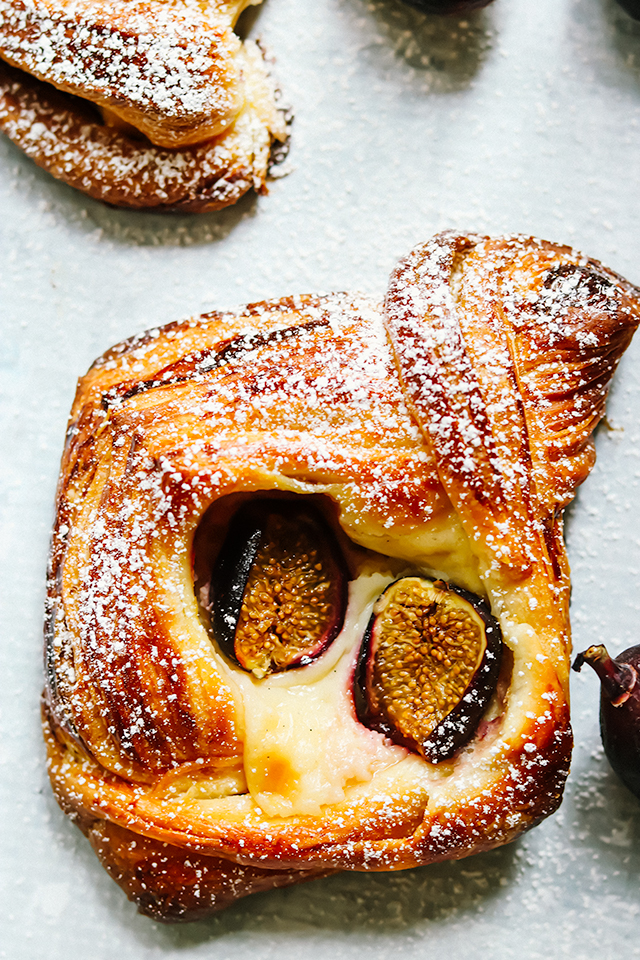
HOWEVER, even though mine were slightly off and created kind of wonky shapes during the final shaping, they were still beautiful and delicious – what really counts.


- 4⅔ cups (655 g) all purpose flour
- ⅓ cup (70 g) sugar
- 2 tsp kosher salt
- 10 tbsp (140 g) unsalted butter, room temperature
- 1 cup (240 g) warm milk
- 2 large eggs
- 2¼ tsp (7 g) active dry yeast
- 30 tbsp (425 g) unsalted butter, cold
- 3 large egg yolks, for egg wash, whisked
- 2 pints ripe fresh figs
- powdered sugar, to garnish
- 1 cup (225 g) cream cheese
- ⅓ cup (70 g) sugar
- 1 large egg yolk, room temperature
- ½ tsp vanilla extract
- ⅛ tsp kosher salt
- Combine the flour, sugar, and salt in a stand mixer fitted with the paddle attachment. Mix briefly to combine. Add the room temperature butter and mix on medium speed for 2-3 minutes or until the mixture is crumbly.
- In a separate bowl, whisk together the milk, eggs, and yeast, stirring until the yeast is completely dissolved. Add the milk mixture to the flour mixture.
- Switch to the dough hook attachment and mix until the dough is combined, about 30 seconds. Remove the dough from the mixer bowl and place it onto a piece of plastic wrap. Press it into an 8x8-inch square. Wrap it so that it is covered completely. Refrigerate it for 30 min to 2 hours.
- Right before removing the dough from the fridge, place the cold butter in a stand mixer bowl and mix it on high speed with the paddle attachment for 1 minute, or until it is slightly soft and a bit malleable. When you remove the dough from the fridge it should feel like they have the same texture and malleability.
- On a lightly floured work surface, roll out the dough to a 9x9-inch square. Place it in front of you so that it looks like a diamond with one of the points facing you. Use your palms or a dough scraper to lightly score a 7x7-inch square in the center of the diamond, creating triangle flaps at each corner.
- Roll out the triangle flaps so that they now form 4x4-inch squares, preserving the 7x7-inch square in the middle.
- Scrape the butter onto the 7x7-inch square and pat it into place so that it completely covers the 7x7-inch square in an even layer.
- Lift up one of the flaps and stretch it so that it covers the butter square completely, tugging and stretching it if needed. Repeat with the remaining flaps. The butter packet will now be completely encased in the dough. Use your hands to firmly press it into a 9x9-inch square.
- Grab a rolling pin and use it to roll the dough into an 18 x 10 inch rectangle. To do this, press the rolling pin down along the entire length of the dough, creating ridges as you go. Then roll out the ridges into a smooth layer. This will help to keep the butter layer even, which will make for better lamination later on.
- Place the dough with the longer side facing you. Take the left side of the dough and fold it in about 3 inches. Fold the right side of the dough over to meet it. Press down on the folds so that they stick together. Now fold the dough in half by folding the right side to meet the left side.
- Rotate the dough by 90 degrees and roll it out again into an 18x10-inch rectangle. Repeat the same folding process from the previous step.
- Place the dough on a parchment-lined baking sheet and cover it with plastic wrap, tucking it under the dough to really wrap it up good. Refrigerate for 1.5 to 3 hours.
- Meanwhile, make the cream cheese filling (recipe below).
- Line two baking sheets with parchment paper. Place the dough on a lightly floured work surface with the long side facing you. Cut the dough in half so that you have two 5x4.5 inch packets.
- Roll one of the packets into a 20x10-inch rectangle. Use a dough scraper to trim the edges so that they are even. Cut the dough in half lengthwise so that you have two long strips of dough. Cut each strip into 4 squares. Fold each square in half diagonally to form a triangle. Make a cut about ½-inch from the edge along both sides of the triangle as if to form a baby triangle, however don't connect the two cuts at the top. This leaves the baby triangles attached to the bigger triangle. Repeat with the rest of the squares. Unfold the triangles back to their square shape. They will now each have a baby square cut into them. Repeat with the second dough packet.
- Brush the egg wash over the squares. Cover and refrigerate the remaining egg wash to use later.
- Take one of the cut outer edges of a square and fold it over so that the point now sits directly on top of the opposite point of the smaller square within it. Repeat with the cut outer edge of the other side. Spoon a tablespoon of cream cheese filling in the center and place it on one of the prepared baking sheets. Repeat with the remaining squares.
- Slice the figs in half and place two halves on top of the cream cheese in the center of each danish. Cover lightly with plastic wrap and allow to proof for 1.5-2 hours in a warm place. They should be very puffy and almost jiggle when poked.
- Heat oven to 350F. Brush the edges of the danishes with the remaining egg wash. Place in the oven on the center and top third racks. Bake for 30-35 minutes, rotating the sheets halfway through, until medium golden brown.
- Allow to cool completely on a wire rack. Dust with powdered sugar right before serving.
- Combine the cream cheese, sugar, egg yolk, vanilla, and salt in the bowl of a stand mixer fitted with the paddle attachment. Beat on medium-high speed until fluffy, about 4 minutes.


You are way braver than me because I would be too intimidated to try this recipe! I think you really excelled at this because I can see all the intricate patterns under the powdered sugar! I’m really impressed. I also think the figs are the way to go with this because after all that work you need the most special of all fruits to fill them! Excellent work! Now you deserve to eat them all and take a vacation day.